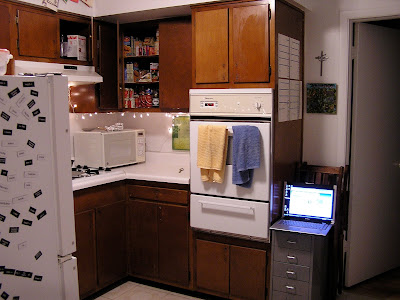
The first "before" picture was taken a couple months after we moved in. The rest were taken during the project.
After some experimenting with cleaning methods (which kept removing the finish), I concluded that the cabinets are covered with a wax coating and over time oils had been clumping the wax near the handles. Disgusting. But refinishing them would take way more time than I cared to spend in a rental. Solution? Cover them in white contact paper, hoping for good results like this kitchen featured on Dollar Store Crafts. The first step was removing the handles. Mr. Kelly worked hard to make them look pretty using his Dremel.
I fully covered some panels with white contact paper, but it looked cheap and goofy on my round-edged cabinets. I took the few panels I'd already done down with no problems. Inspired by this credenza facelift, I decided to go for stripes instead.
Not only do the stripes fit more nicely on the cabinets because I could wrap the ends around the top and bottom, but they also give visual height to the room and add some fun. And they were easier to position correctly than a large sheet of contact paper.
It just so happened that my apartment managers showed up a couple days later to do their yearly inspections. And they were impressed! Yay! Our neighbor came by later and suggested we leave the handles off, too. So we did.
 We also have a vinyl graphic by Blik in our kitchen.
I worked in a sign shop for a while, so I like to consider myself pretty good at applying vinyl and sticky-paper things. But the stripes make everything really easy (although slightly more time consuming).
White contact paper is really easy to find (try your grocery store, Target, or Walmart). I also have my eye on DesignYourWall.com for lots of fun colors, but you have to order a lot so it gets expensive.


No comments:
Post a Comment